Zentrik MCP
Connect Zentrik MCP in Cursor
Follow these screens to connect Zentrik MCP in Cursor.
In Cursor, Add Custom MCP opens mcp.json. That is expected. Use https://zentrik.ai/mcp, then authenticate in the browser.
Steps
Cursor stores remote MCP servers in mcp.json.
1. Open MCP settings
Open Settings → Tools & MCPs and choose Add Custom MCP.

Cursor MCP settings before setup.
2. Add Zentrik to mcp.json
In mcp.json, add:
{
  "mcpServers": {
    "zentrik": {
      "url": "https://zentrik.ai/mcp"
    }
  }
}
Save the file and return to the MCP settings list.
If Cursor starts you with {"mcpServers": {}}, add the zentrik entry inside that object.
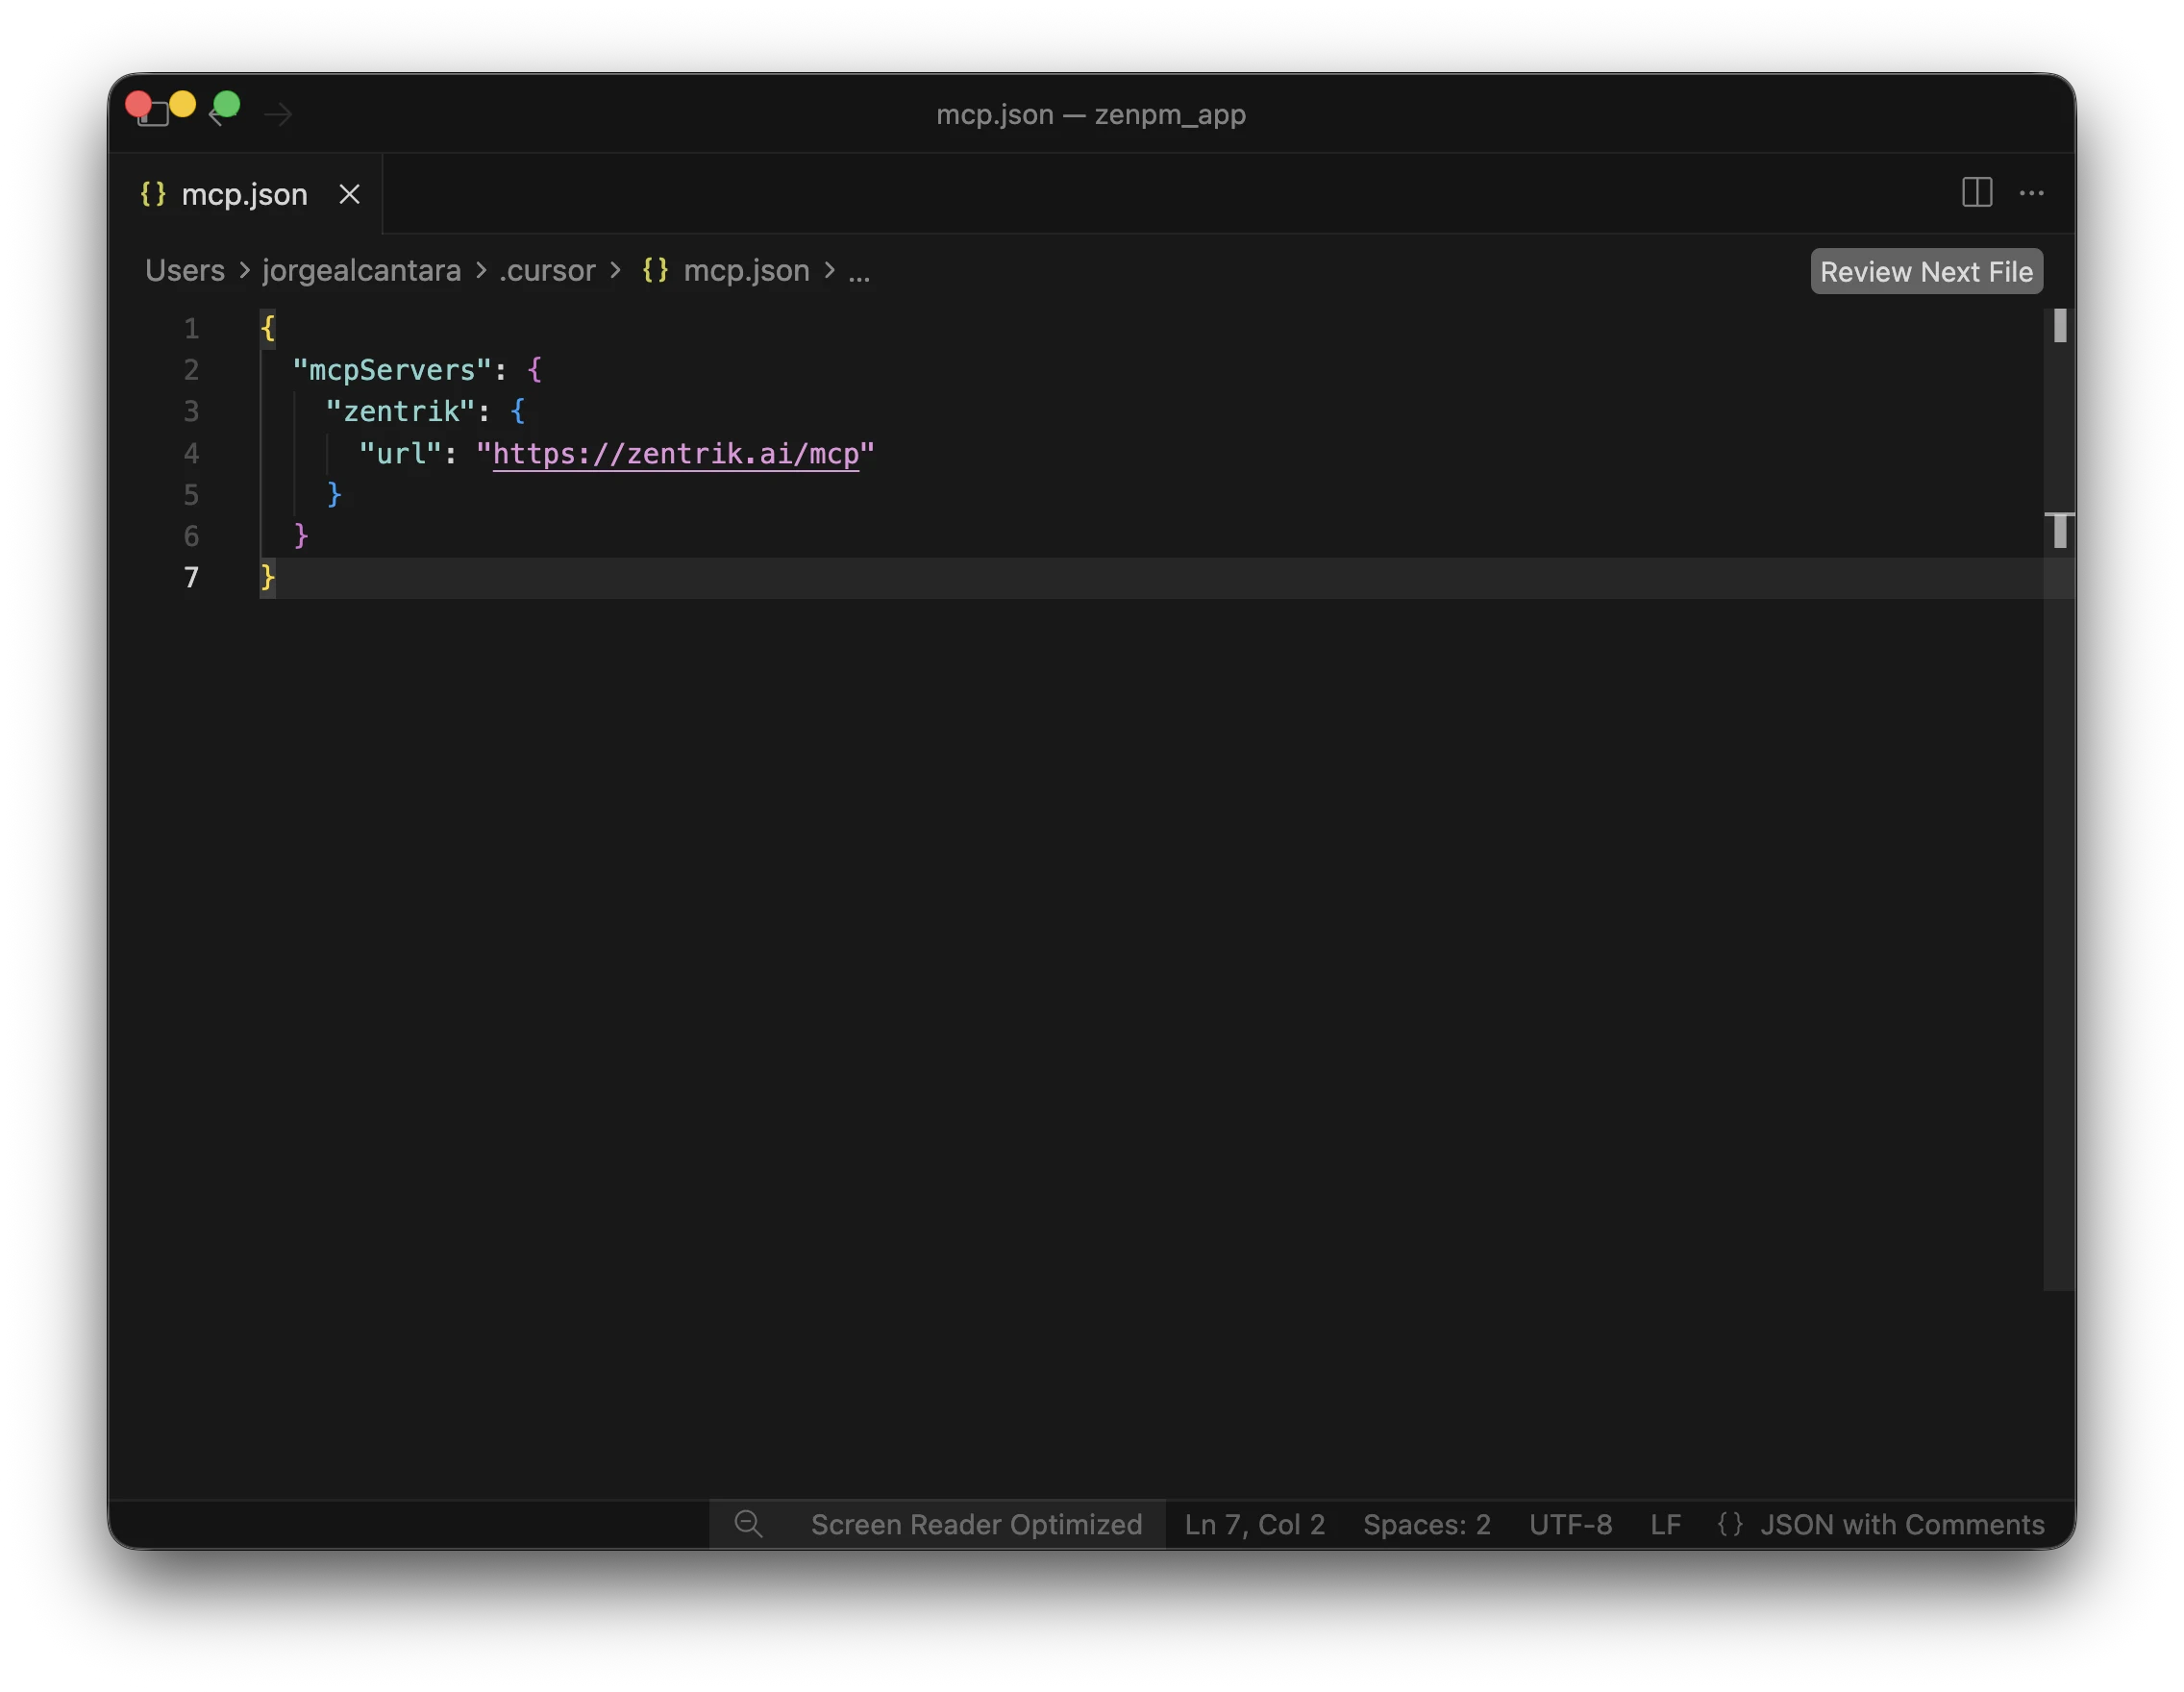
Cursor mcp.json with the Zentrik server entry.
3. Authenticate
In the MCP settings list, find zentrik and use Authenticate or Connect.
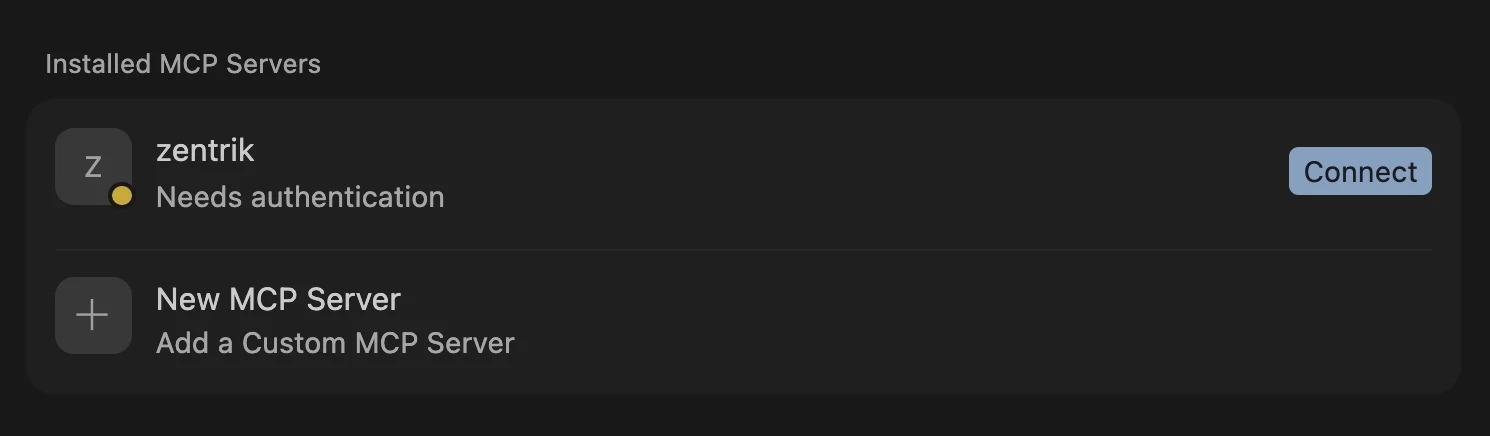
Cursor MCP list with Zentrik ready to authenticate.
4. Approve in Zentrik
In Zentrik, choose the workspace for this connection and approve access.
You can store this in project-level .cursor/mcp.json or global ~/.cursor/mcp.json.

Zentrik approval screen during MCP authentication.
You are connected
Once Cursor is connected, it can call the Zentrik tools available in that workspace.
- ask for the evidence behind an idea before coding or planning
- bring the relevant opportunity or context record into your working session
Next:
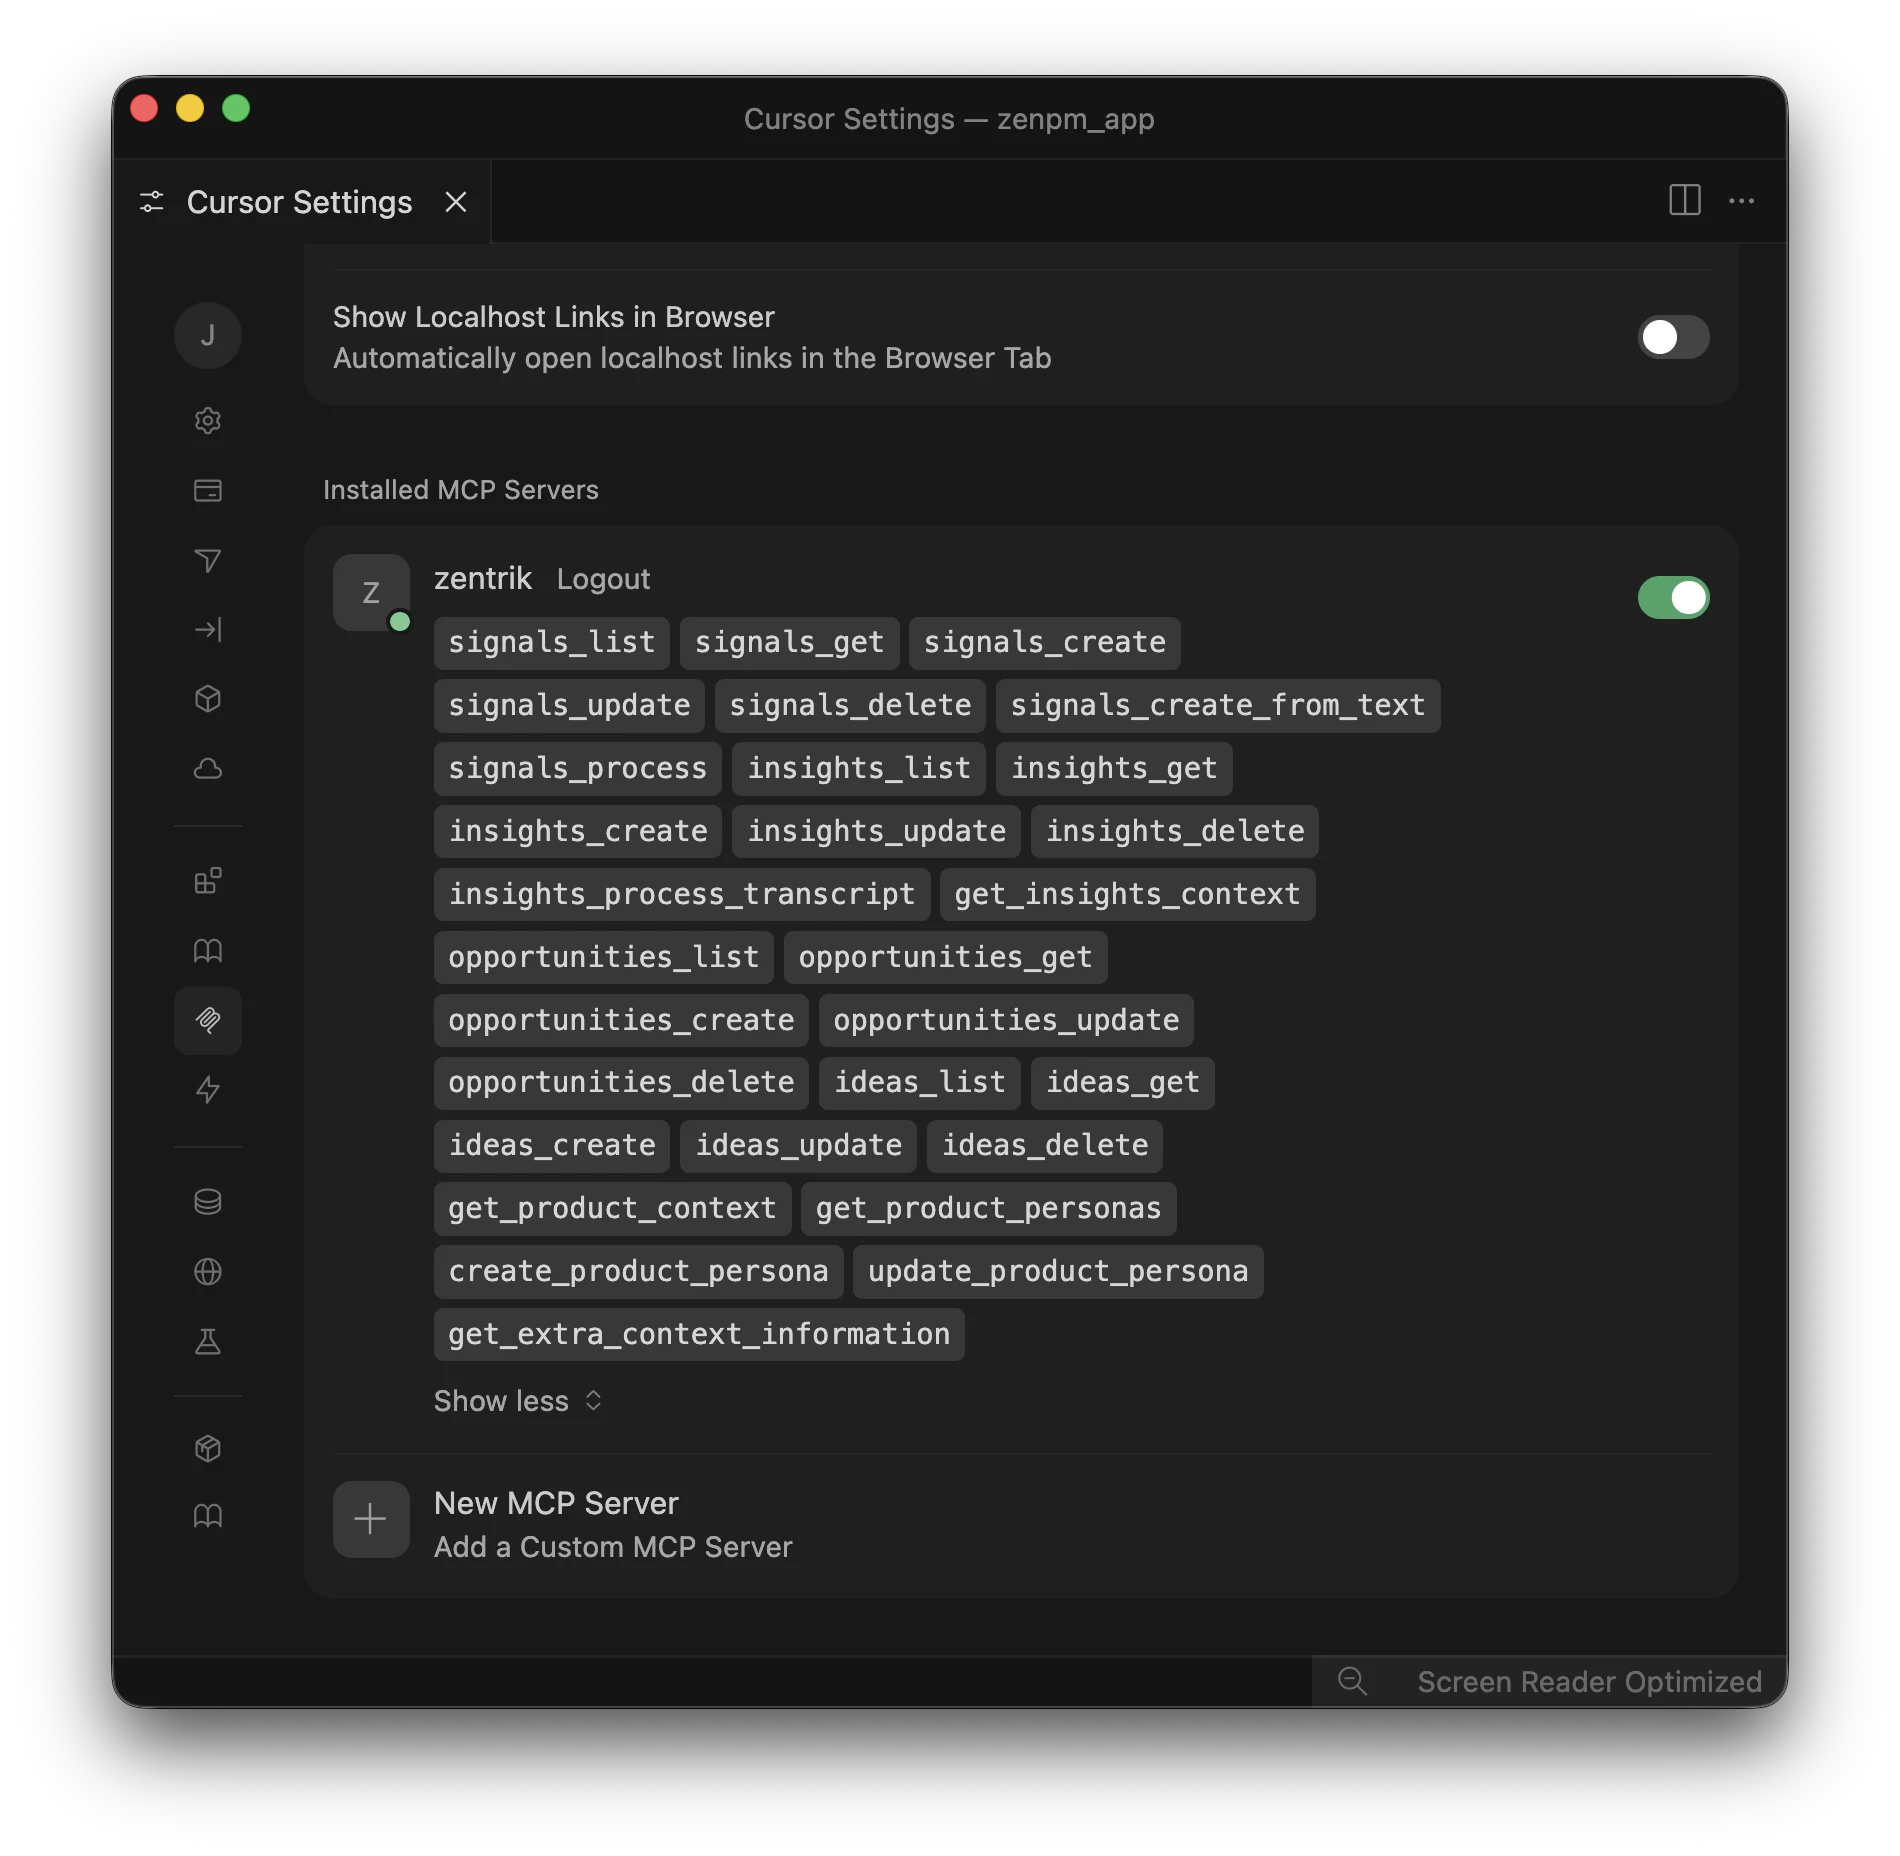
Cursor connected to Zentrik MCP with tools available.
Troubleshooting
Check these steps against what you see in your workspace. If something differs, note your workspace name and the screen, then contact us.
Add Custom MCP opened JSON
That is the expected flow in Cursor. Add the zentrik server entry inside mcpServers, save the file, then go back to the MCP settings list.
The server appears but is not authenticated
Use the row action to authenticate, then complete the browser OAuth flow. If the row never appears, reopen the settings view and confirm the url is exactly https://zentrik.ai/mcp.
I chose the wrong workspace
Run the auth flow again and choose the correct workspace. Each MCP connection is bound to one workspace at a time.